Now that summer has rolled around, I've had wayyyy too much time on my hands. Since school is out for summer break, I'm out of a job, and thus I have relocated to a more affordable place. A place where I can afford to spend 8 hours of my day writing my novel instead of contributing to the work force. That place is my mother's house.
While I have been able to get a lot of work done on my novel, I have been extremely poor due to my lack of a real job lately and therefore have not had the opportunity to do many things besides sit around my mother's house and clean out of boredom in between writing sessions. So to break up the monotony today, I took my brother Jonathan and my sister Ne-lo to the mall today. I bought myself two awesome shirts; one is a Sonic the Hedgehog shirt and the other is a Gorillaz shirt. I feel like it is particularly important for me to proudly display my nerdiness with such shirts. It prevents false advertising.
So anyway, Jonathan, Ne-lo and I all had a rockin' time at the mall. But the real adventure today began when Ne-lo looked in the cabinet today and unearthed a glorious discovery...
A packet of cake mix!
So we decided to document the exact process of Ne-lo and SM making a cake. Now it is time to release this secret formula to the public. If you're prepared, read onward.
I present to you:
Ne-lo and SM Throw a Party.
(All pictures taken by Ne-lo, the expert picture-taker, unless otherwise stated. Click on a picture to enlarge it)
Warning, the following post is extremely picture heavy and EXTREMELY long. If you have anything planned in say, the next week or so, you should probably call and cancel it right now.
Step one: BE FABULOUS. This is probably the most important thing to keep in mind while you are baking a cake. If you ever have to wonder if you're being fabulous enough, you probably aren't.
Step 2: Crack eggs. You should always start a good cake by cracking the eggs.
Step 3: Measure out the butter! But remember, you can't just plop a stick of butter right into the cake mix. You have to soften it first. This step can be a little difficult but just remember, everything gets easier with practice.
Step 4 - Open the microwave...
Step 5: And place the butter inside...
Step 6 - and close the microwave! See? Simple as that! You've now microwaved butter!
Step 7 - Oh, you should probably start the microwave as well.
Step 8 - Locate your cake mix!
Step 9 - Stop for a random picture of the dog.
Step 10 - Measure out the water needed for the recipe.
Step 11 - Time to open the cake mix. Locate a pair of scissors and cut.
Step 12 - You may have to use a lot of force to successfully open the cake mix.
Step 13 - Hooray! You've done it!
Step 14 - Empty the cake mix into the bowl.
Step 15 - Discard of the plastic bag. This is a choking hazard for small children. You don't want that kind of blood on your hands while you're trying to enjoy your delicious cake.
Step 16 - Combine all ingredients!
Step 17 - Prepare to whisk!
Step 18 - Read the instructions.
Step 19 - It is okay if you have to use brute force to whisk the cake. You show that cake who's boss.
Step 21 - Eventually, you might realize that your whisking ability isn't quite as good as an actual mixer.
Step 22 - At this point, you may want to search for a mixer.
Step 23 - Continue searching. It'll be around somewhere.
Step 24 - Find one mixer head. Only one.
Step 25 - Find the other mixer head, but realize it doesn't fit. Spend several minutes trying to force it to fit.
Step 26 - Eventually find a matching set of mixer heads in the dishwasher. Retrieve them.
Step 27 - Mix that sucker! Mix it up good!
Step 28 - Blow the breaker in the kitchen. Become sad. Yell for someone to come and help you.
Step 29 - Watch as whoever came to your aid resets the entire breaker.
Step 30 - Continue waiting.
Step 31 - Time for another random picture of the dog.
Step 32 - Yay! It's back on! Continue mixing!
Step 33 - Be photobombed.
Step 34 - Remove the mixers. Their job has been completed.
Step 33 - Have you used enough Pam? You probably haven't. Use some more.
Step 35 - Pour the batter equally into the Pam'd pans.
Step 36 - Smooth out the batter so the surface is nice and even.
Step 37 - Ta-da! You're ready to put your cake in the oven!
Step 38 - Remember to place both pans in the oven.
Step 39 - Also, don't forget to close the oven door. That's a very important step.
Step 40 - Hooray! Your cake is in the oven! You've successfully completed the first half of a cake!
Step 41 - Now that you have put your cake in the oven, it's time for some fun. You may now eat the rest of the unused cake batter, but remember-- You work in the public education system and your career would be ruined in a heartbeat if any photos that were even slightly provocative showed up on the internet, so eat your batter wisely. Lots of teeth or funny faces are preferred. Have a ball.
Step 42 - Check your cakes. Are they brown and poofy? Time to do the toothpick check.
Step 43 - Look for the toothpicks. Surely they are around somewhere.
(Ne-lo found the toothpicks and snapped a picture of them while I continued to hunt for them)
Step 44 - Prick your cakes with the toothpick. Does the toothpick come out clean?
Step 45 - Bingo! Your cakes are baked!
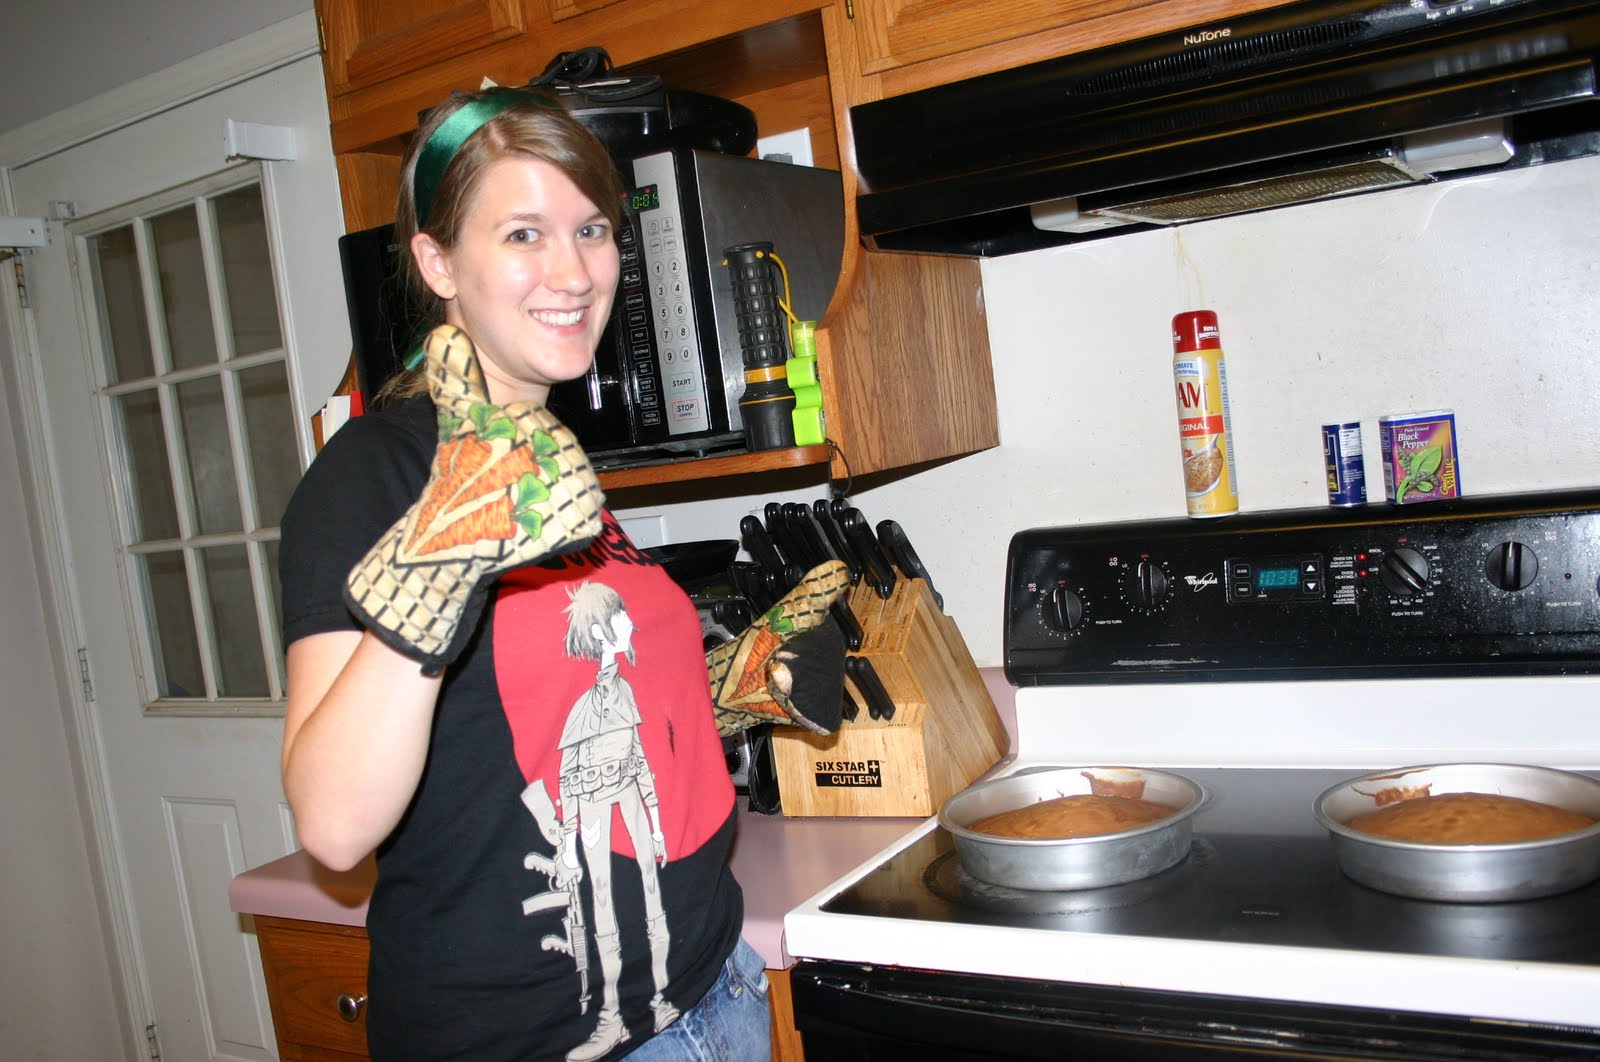
Step 46 - Remove your cake from the oven.
Step 47 - Don't forget to be fabulous! Rock those oven mitts!
Step 47 - Go on, clap for yourself a little bit. You deserve it.
Step 48 - You are a professional. You are a winner. Remember that as you allow your cakes to cool for at least 30 minutes.
Step 49 - Make sure all of your decorating items are together.
Step 50 - Who put bacon bits next to my frosting?? Who did that?? Why are those there??
Step 51 - Remove the cakes from the pan. If you used enough Pam, this should not be an issue.
Step 52 - Unfortunately, you probably didn't use enough Pam. Try unsuccessfully for another 10 minutes to get the cake out of the pan.
Step 52 - Finally succeed in getting one layer out of the pan! There may have been a little tearing of the cake, but don't worry. This is easily fixed.
Step 53 - Simply take the cake and position it flat on a plate.
Step 54 - Scrape the torn layer of cake out of the pan...
Step 55 - And gingerly take it and lay it onto the bottom layer, making sure to line up the edges neatly.
Step 56 - Make sure you take extra care in piecing your cake back together.
Step 57 - Congratulations! You can't even tell anything went wrong! Wow!
Step 57 - Executive decision. Ice the bottom layer of the cake before trying to get the top layer out of the pan. This will act like a glue in case things don't go smoothly with the removal of the top layer.
Step 58 - Open the icing can. This is a job for teeth.
Step 59 - Ice that baby!
Step 63 - It is time to show the top layer who is boss. Taking a firm grip on the cake...
Step 64 - Wrench, and pull...
Step 65 - Keep a firm grip on the cake in your grasp...
Step 66 - And you've done it. You've dislodged that stubborn sucker.
Step 67 - Now it's time to assemble the cake.
Step 68 - See how professional that looks?
Step 69 - Take a step back and admire your cake in its raw form before you begin the next stage of icing.
Step 70 - Slather that icing on.
Step 71 - Be generous! Everyone loves icing!
Step 72 - Remember, more is more! Oh, and strike a fabulous pose, it's probably been too long since you were last fabulous.
Step 73 - Voila! You are a professional icer!
Step 74 - Set the table for your party. Ne-lo and I know that you can't throw a successful party without pickles, a salt shaker, and Canada Dry, so that's what we picked for our party scene.
Step 75 - Candles can really add a personal touch to a party. We suggest adding plenty of candles.
Step 76 - After you've placed your candles, it's time to light them. A candlelit cake can really make a party great!
Step 77 - Just look at that beauty. Take a step back and admire your craft!
Step 78 - Total perfection.
Step 79 - It's fun to lick the candles, but remember to follow the same photo guidelines from earlier!
Step 80 - Time to serve the cake! Call your party guests, the fun is about to begin!
Step 81 - A nice, big piece for Ne-lo....
Step 82 - Here you go, Ne-lo!!!
Step 83 - And a nice big piece for me!
Step 84 -YAY! You've mastered the art of entertaining!
Step 85 - Enjoy your party! Doesn't everyone here look like they are having the time of their lives?
Yeah. I'm definitely going on Cake Boss...


No comments:
Post a Comment